

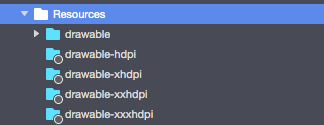
All of us at the time of adding images to the resources folder, have seen inside there a lot of folders with the prefix name drawable followed with a “-“ and each one of the screen density types (drawable-hdpi , drawable-xhdp
To better understand, first we must have some previous knowledge:
⚪ Pixel: It’s the smallest unit of a digital image or graphic on screen based on color or grayscale points.
⚪ Screen density: It’s the number of pixels inside a physical screen. Best known as dpi (Dots per inch).
⚪ Pixels independent of density (dp): It’s the unit of virtual pixels that you must use to define the UI design.
Let’s dive into it
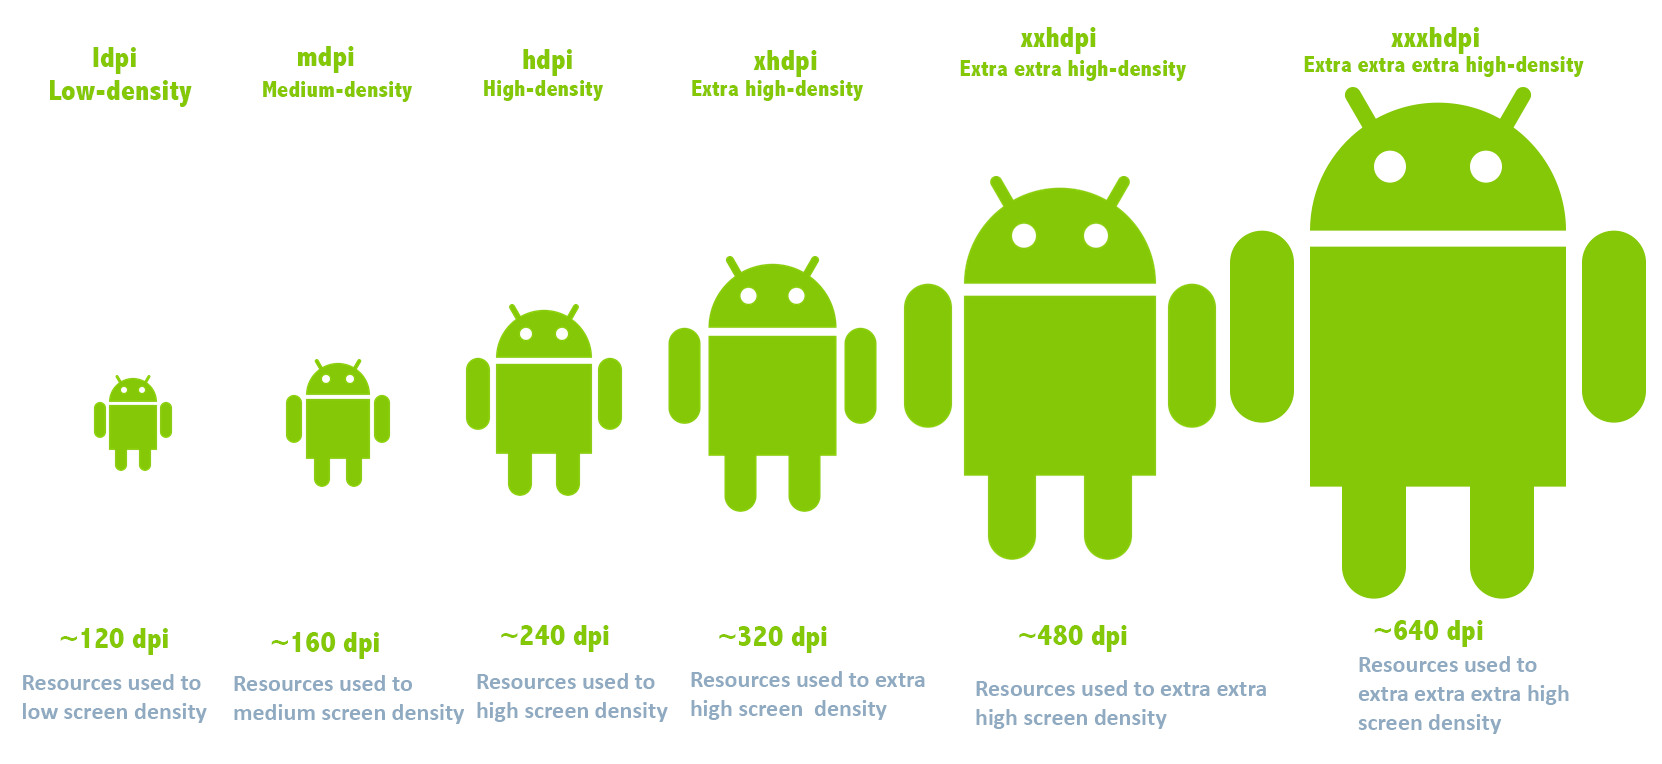
 There are a lot of Android devices with different screen sizes, that’s why Android provides a classification of screen densities, six to be exact. This classification help us to have a better result with the images in our applications, because they display the same quality of the resources disregarding the screen size, just by processing internally an automatic evaluation about what density corresponds to each screen. You just have to be sure that your folders are fill with the correct densities.
Which are the types of screen densities?
In our Android Xamarin project we have the Resource folder, inside there we can see some folders named: drawable , drawable-
And what about Drawable Folder…?
![]() This is the default folder, if the image is not found in any of the others, Android will look for it in this one as a last resort.
This is the default folder, if the image is not found in any of the others, Android will look for it in this one as a last resort.
Exactly, how does Android provides correct screen densities to our images..?
Now I will explain you how your Xamarin Android project knows which one is the correct screen density.
Xamarin Android evaluates each one of screen densities starting by the biggest dpi types (xxxhdpi) and finishing with the smallest types (ldpi). Using following order: xxxhdpi , xxhdpi, xhdpi , hdpi, mdpi andldpi.
I will show you different behaviors about how Xamarin founds the right one for your device:
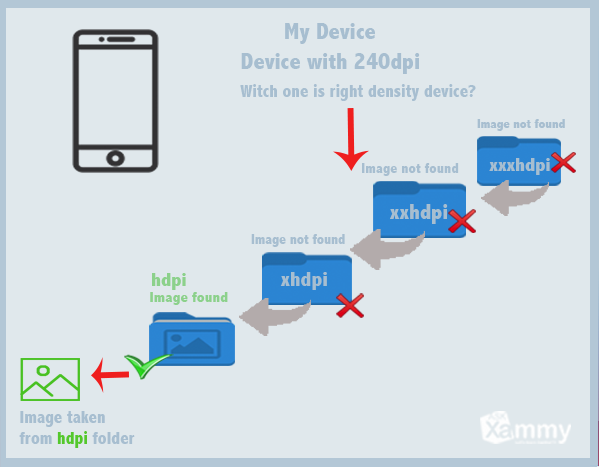
1. Providing the right image in your drawable folder: Each device is inside of a density type, Android finds the corresponding type by using a descending search until it identifies the right drawable folder to get the image. In this sample drawable-hdpi.
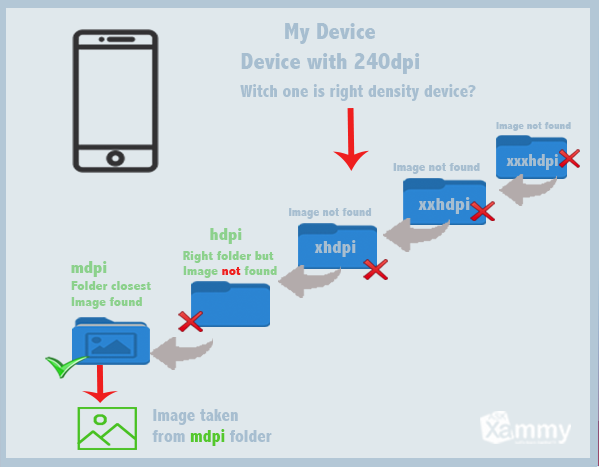
2. What happens if I have available images within others similar drawable folders? When Android doesn’t found the image in the right drawable folder, it continues finding in the others folders until it finds the closest fit image.
3. But what happens if no images exists in any of our drawable folders? When Android doesn’t find the image in any drawable folder with the specific density type (Drawable-hdpi , drawable-mdmi, drawable-ldpi, …), then it proceeds to find it in the default drawable folder.

I’ll leave you a tool that automatically generates all needed images densities:
There are some tools that help you to quickly create your images. Following the one I prefer because it’s easy to use. Follow these simple steps:
- Access to this link: https://appicon.co/#image-sets , after you will see the following screen:
- Select Choose files and upload your image.
- After, click on Generar Imagenes and folder with every image type density for Android and IOS platforms will be downloaded into your computer:

Following a link with information about some ppi devices that will help you: https://qualitytestingtips.blogspot.com/2016/02/brand-devices-pixel-per-inch-ppi.html
Spanish post: https://medium.com/@reyes.leomaris/comprendiendo-densidades-de-pantalla-en-xamarin-android-ccd373daf09f
References: https://developer.android.com/guide/practices/screens_support?hl=es-419


1 thought on “Comprehending screen densities in Xamarin Android”