

Merry Christmas! 🎄 I hope you’re doing well during this season and enjoying time with your loved ones! 💓 As we wrap up the year, let’s continue improving our XAML skills by replicating a Christmas-themed user interface (UI). You’ll see how you can create impressive results with simple steps! This UI is based on a design sourced from Dribbble!
Explanation Insights
🗒 Before diving in, here are some guidelines to enhance your experience while replicating the UI:
▪ Reference Image: Initially, you’ll encounter an image displaying the original UI. This image is segmented into blocks, mirroring how we’ll approach each design element.
▪ Design Blocks: Every block features a specific design element we’ll focus on. These elements are accentuated within a highlighted box.
▪ Code Annotations: Within the coding sections, lookout for comments stating, “Insert the following code here.” These comments signal that the upcoming code explanation corresponds directly to that marked location.
Let’s start!
Breaking Down the Original Design into Blocks
For clarity and a structured approach, I’ve segmented the original design into specific blocks. We’ll tackle each block in the sequence presented below:
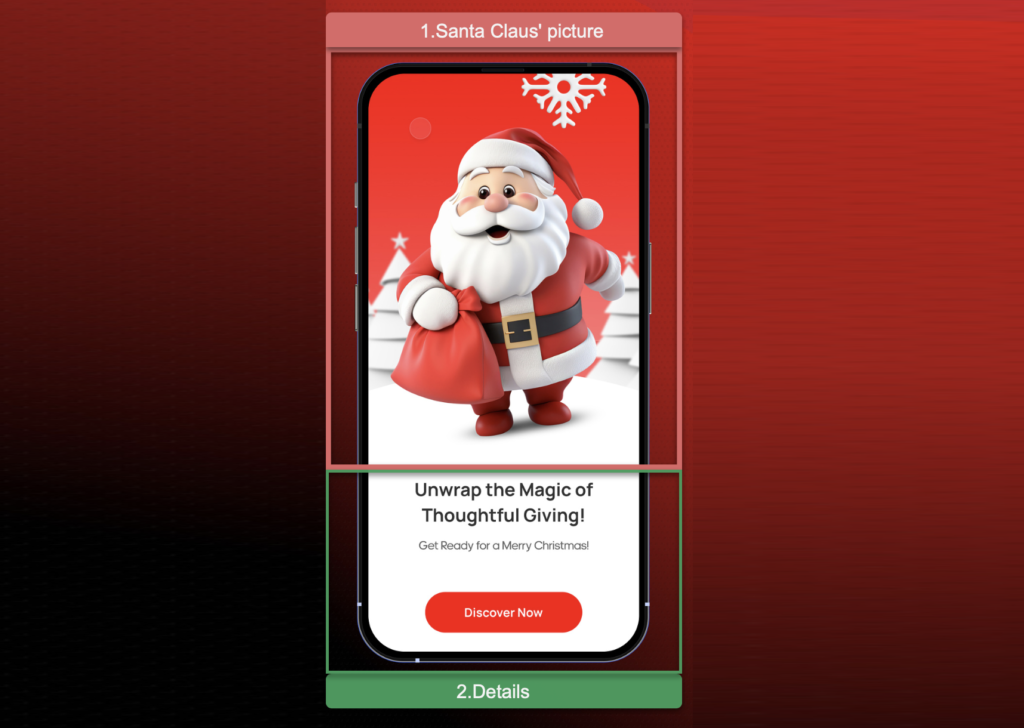
Main structure
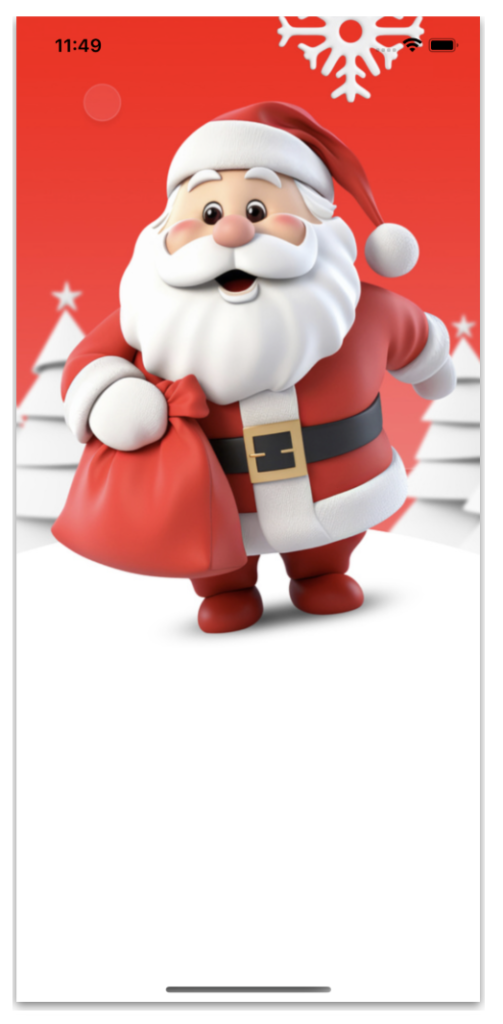
In this case, we want to keep the same colors for both light and dark mode, let’s start by adding a white background color to the ContentPage.
⚠️ Additionally, if you’re interested in learning how to adapt your applications for both light and dark modes, I highly recommend the article “Handling Light and Dark Mode With .NET MAUI” .
To organize the UI elements we will use the VerticalStackLayout as the main layout:

Let’s start by adding the main block:
➖ Santa Claus’s picture:
Our main block contains the image of Santa Claus. To adapt the appearance of the image, we will use the Aspect property adding ‘Fill’ as a value. This property can be very useful for adjusting the appearance of your images. I encourage you to explore the different results it can offer.
For more information, please refer to the provided article Image Scaling in .NET MAUI.

As you can see, this user interface is incredibly simple and quick to create! Now, we have reached our final block, which is made up of three elements. We will explore every detail below:
➖ Main description:
💡 Tip: Notice that within the text we have the following combination of characters “ ”. What exactly is it for? It allows us to insert line breaks in the text!
➖ Second description:
➖ Discover button:
And our Christmas UI is done!  .
.
Thanks for reading! 👋 See you next time! 💚💕
Spanish article: https://es.askxammy.com/creando-ui-de-navidad-en-net-maui/

2 thoughts on “Creating Christmas UI in .NET MAUI”