

Howdy!!! ?♀ In this #LoveMonth let’s continue with the third post of the UI series for February! In this case we are going to replicate a Travel UI obtained from Dribble. You can check it here!
⚠ Before starting, to get the best out of the post, I’ll leave you some instructional notes so that you have a better experience reproducing the UI:
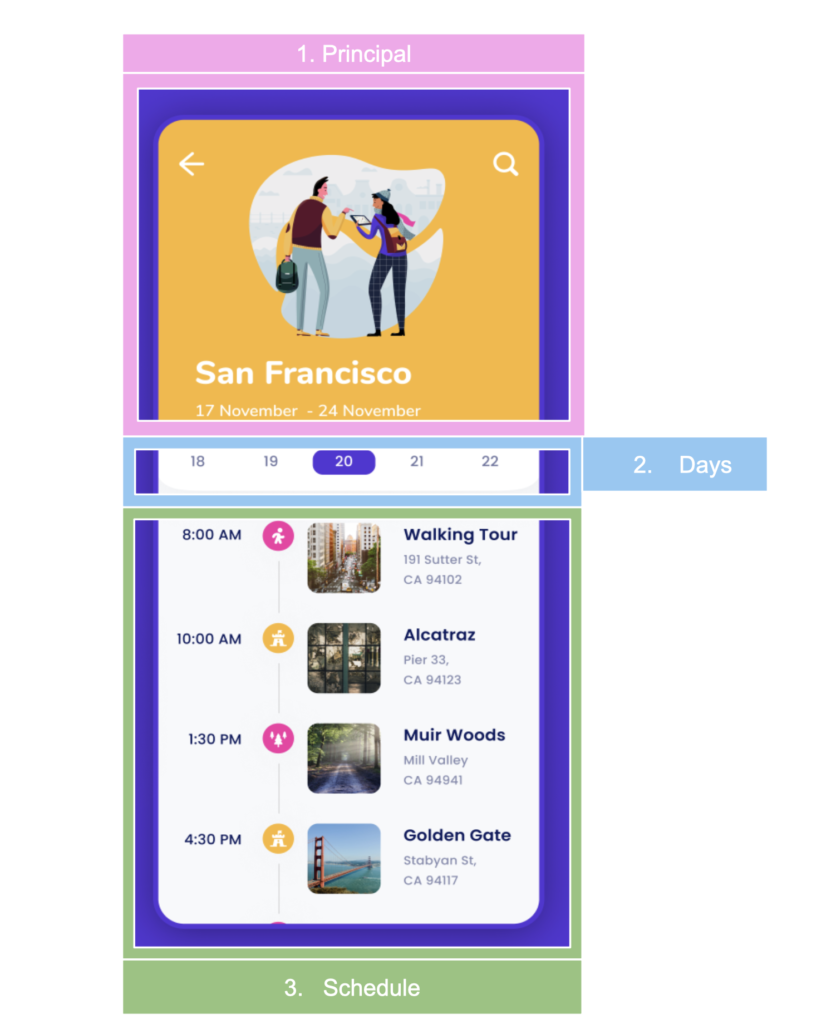
➖ At the beginning, you will see an image with the original UI where you will see divided into blocks as we’ll be working each part of the design.
.
➖ Each block presents the image with the design explicitly that we’ll be working on that block, they are highlighted in a box.
.
➖ In each of the code blocks you can see a comment that says: “Here add the code that is being explained in the next block“. To keep you as focused as possible, this part indicates you that the next block code explanation goes right where the comment line is added.
Let’s start!
Let’s divide the original design into blocks
To better understand, I have divided the original design into blocks, which are listed in the order in which we will be reproducing each one, these are:

.
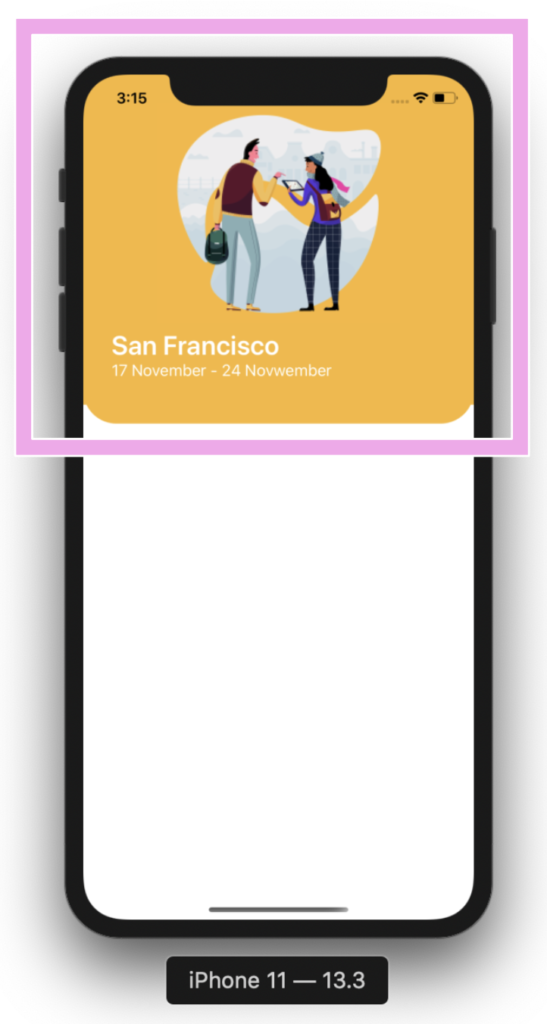
Let’s start! In this part we will be working with the Principal block and to replicate we just need to add the following parts:
.
➖ Main image
➖ Place name
➖ Travel date
.
As is the first block of our page, we need to set the full layout structure that will be contains our design, in this case I use a StackLayout.
.

..
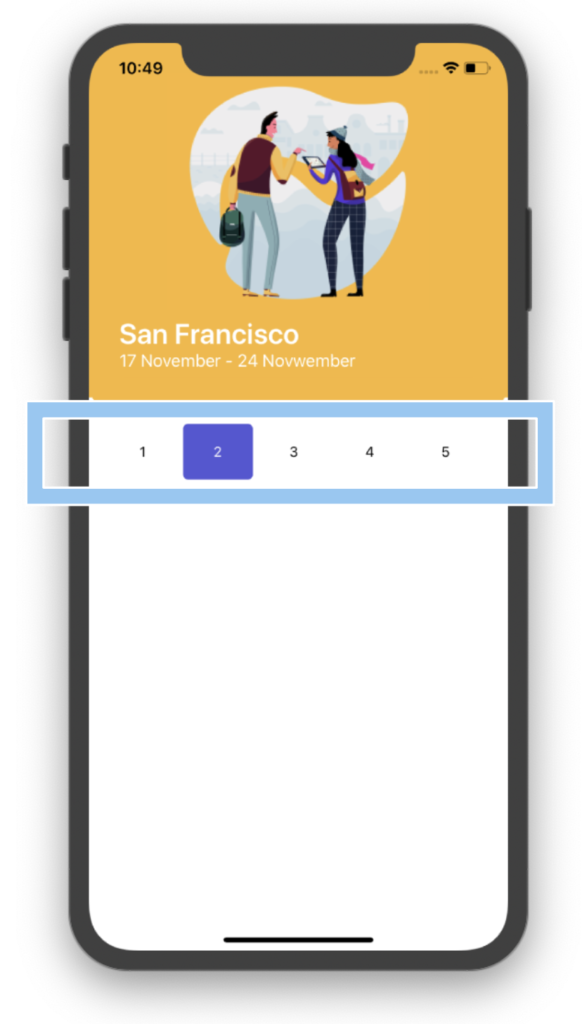 To build Days block let’s start dividing in three parts:
.
➖ Adding XAML design
.
➖Handling days changes: Here we’ll be using Visual State Manager (If you don’t know about read about it here.).
.
➖ Setting the look and feel
.
.
.
.
Adding XAML design:
.
Handling days changes (Add this code in your App.xaml):
Setting the appearance of the selected and unselected days (In this example we will be working in the YourPage.xaml.cs):
To create this block, I inspired in this sample.

.
.
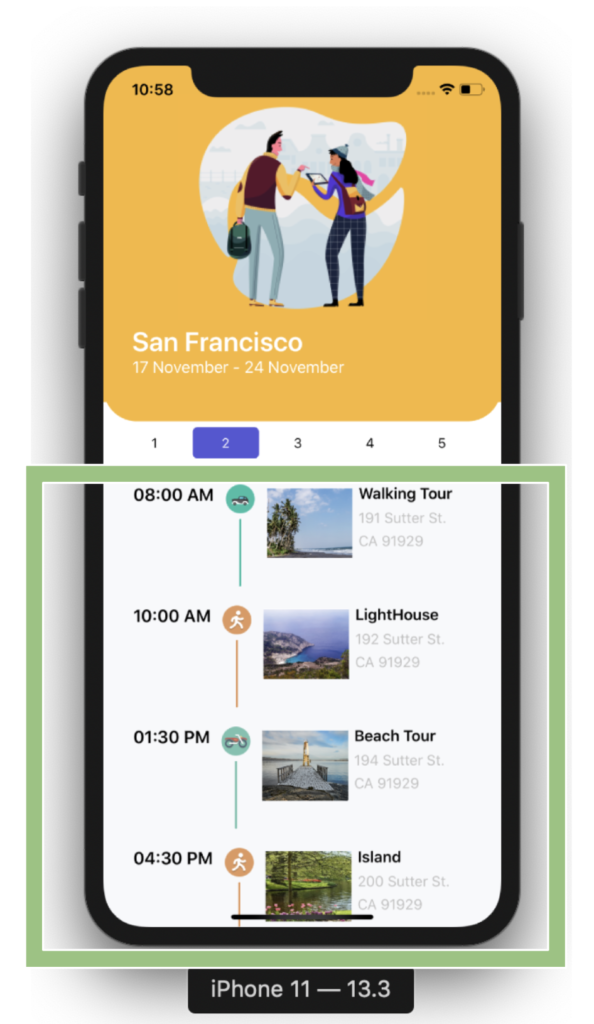
Once Days block finished, let’s continue with our last block named Schedule. Here we will be using a CollectionView. It’s important that the project adheres to the MVVM Design pattern. That’s why I used text properties Binded.
.
To replicate this block we just need to add the following parts:
.
➖ Time
➖ Travel indicator
➖ Place to go
➖ Place description
.
.
....
.
And our Travel design is done! ?.
 https://github.com/LeomarisReyes/TravelAppSample/tree/master.
Spanish post: https://medium.com/@reyes.leomaris/replicando-ui-de-viajes-en-xamarin-forms-1e108d959987?sk=1c6fe166c3236a48b2bab33feaea4c7c
.Thanks for reading!!! 


So simple n useful, thank U Leomaris
Thank you! ☺️
So nice!! Genius!
☺️ Thanks!
Allways learning!
Thank you for sharing.
Thank you ?!
Hello!
Why do you no add your ui xamarin projects in snppts.dev?
Hello!!
I’m pending to add them! ?
Hii, Leomaris Reyes, i m new to xamarin forms i find your blog very helpful, it help speed up the learning process. Thank you very much, i hope to master soon and start helping others. God bless you
?? Hi Shadrach! Nice to meet you! It’s a pleasure for me to know it! Keep it up and God bless you too! ?