
If you’re looking to improve your app’s user-friendliness and interactivity, consider adding animations. Lottie makes it possible to incorporate animations in JSON format without slowing down your app. Learn more about Lottie and how to integrate it into .NET MAUI by reading our article!
The explanation will be divided into the following points:
🔹 What is a Lottie animation?
🔹 Initial setup
🔹 Choosing your animation
🔹 Adding the animation to your project
First of all… What do I need to know? 🤔
What is a Lottie animation?
Lottie is an open-source file format for animations based on JSON. It’s part of SkiaSharp and allows you to send animations to any platform as easily as sending static assets. Lottie is an alternative to GIFs and other types of animated files, and offers the following benefits:
▪ Reduced file size: Lottie files are much smaller than other formats like GIF or MP4 while maintaining the same quality.
▪ Vector-based adaptability: Lottie’s animations are vector-based, allowing you to scale them without affecting resolution.
▪ Limitless customization: Since Lottie’s animations are vector-based, you can customize them without worrying about resolution.
▪ Interactivity: You can manipulate animation elements to make them interactive and respond to user interactions such as scrolling, clicking, and mouse-over.
Let’s start!
We will learn to implement it by applying the following instructions:
🔧 Initial setup
➖ Add from NuGet Package – SkiaSharp.Extended.UI.Maui – At the time of writing this article, this Nuget Package is in a preview version. To add it, you must activate the “Include prereleases” option.

➖ Go to your MauiProgram.cs file
In the CreateMauiApp method, go to the line .UseMauiApp<App>() and add the following line of code just below it:
⚠ Don’t forget to add the using SkiaSharp.Views.Maui.Controls.Hosting; at the top of the class.
➖ Go to your .xaml file and add the following namespace. (In this example we will add it in the MainPage.xaml)
📝 Choosing your animation
Now you need to select the animation you want to use in your app. You have two options for doing so:
🔹 Create an animation in Adobe After Effects: You can create your animation and export it to a JSON file with the help of the Bodymovin extension.
🔹 Or select an animation already created in Lottiefiles. – In this article, we will implement this option. Therefore, apply the steps explained below:
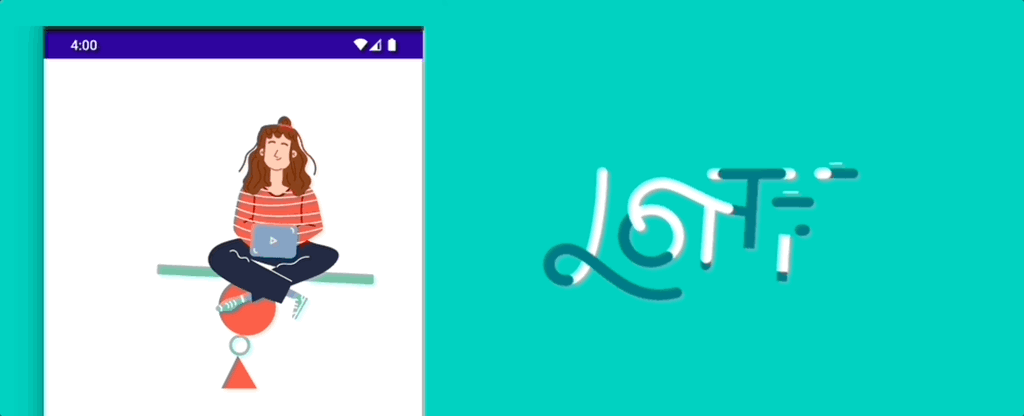
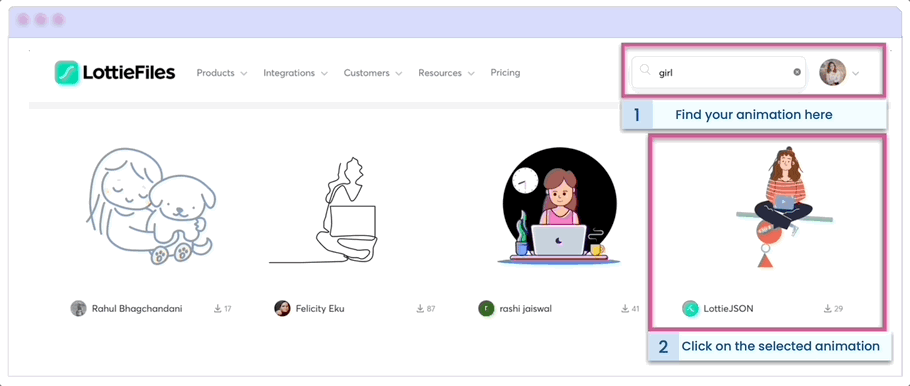
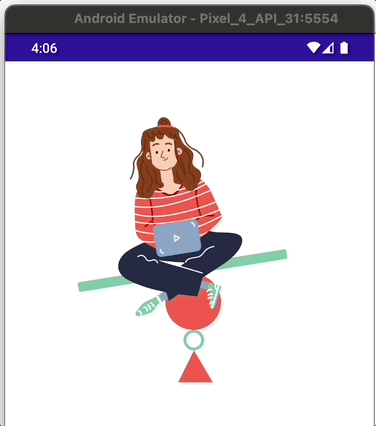
➖ Step 1: To find an animation on Lottiefiles, start by creating an account. Next, use the search bar to enter a topic. For the purpose of this example, I will search for “Girl”. Once you have located the desired animation, click on it.
➖ Step 2: Once you have clicked on the animation, go to Download button ➡ Upload to My Workspace option.
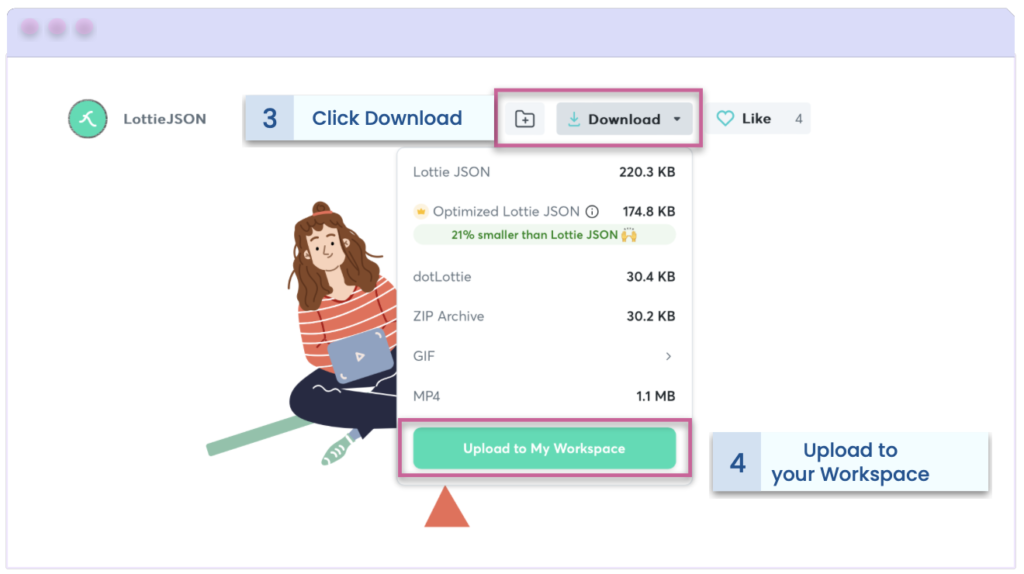
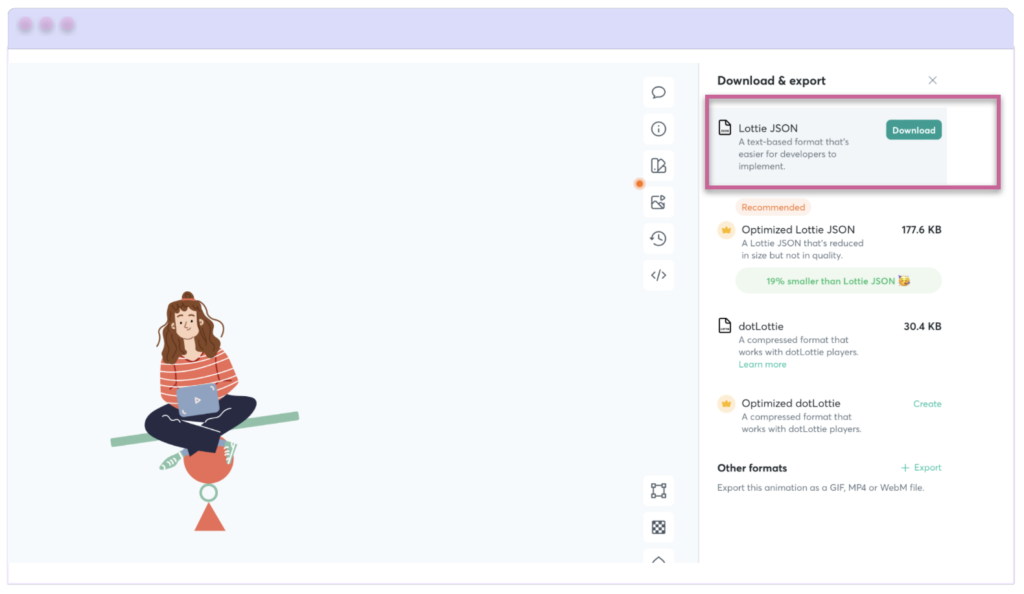
➖Step 3: Once you have completed the previous step, a button will appear to save the animation. This will be available in your workspace, ready to download. To do this, go to the right side menu and select Lottie JSON ➡ Download.
📒 Adding the animation to your project
We have already downloaded the animation to use in our app! Now all that remains is to add it to the project.
🔹 Add the animation to the Raw folder: Go to Resources ➡ Raw ➡ Right click add ➡ Existing files ➡ yourAnimation.json.

🔹 Displaying the animation:
To add the animation, we will use the SKLottieView from the SkiaSharp namespace, which we added at the beginning of this article with the alias “skia”.
SKLottieView provides different properties that allow you to have more direct control over the animations. The most important of these properties are the following:
➖Source: It’s the animation that will be played in your application, remember that it’s in .JSON format– [Of type SKLottieImageSource]
➖Progress: It’s the animation’s current playback progress. – [Of type TimeSpan]
➖RepeatCount: You can specify how many times the animation should be repeated. It’s default value is 0, but you can set it to -1 to repeat the animation infinitely. – [Of type int]
➖RepeatMode: It’s the way in which the animation will be repeated. This can be Restart or Reverse. the default is Reset. – [Of type SKLottieRepeatMode]
How to do it code?
And done! 😎 From now on, you are ready to implement Lottie animations in your .NET MAUI applications! 💚💕
<Label Text=”Thanks for reading! 👋 ” />
Spanish post:

3 thoughts on “Lottie animations in .NET MAUI”