Knowing how to save files in our applications is very important, however, the perception has been that implementation can be tedious. Thanks to the .NET MAUI Community Toolkit using FileSaver, you can now save files much faster. In this article I will show you all the necessary elements to achieve it.
🔧 First of all… What do I need to know?
What is .NET MAUI Community Toolkit??
- It’s a collection of reusable elements such as animations, behaviors converters, among others, for developing applications for iOS, Android, macOS and WinUI using MAUI.
🔧 Still haven't implemented it? Check it here!
- Add from NuGet Package: Community.Toolkit.Maui

- Now let’s initialize: Go to your MauiProgram.cs file
In the CreateMauiApp method, place in the .UseMauiApp<App>() line and just below it add the following line of code:
⚠ Don’t forget to add the using CommunityToolkit.Maui;at the top of the class.
Platform Settings
Once you have the MAUI Community Toolkit installation ready. Let’s continue by adding some platform settings. To implement them, follow the instructions added below:

On Android: Go to Platform ➖ Android ➖ AndroidManifes.cs and add the following code:
 On Tizen: Go to Platform ➖ Tizen ➖ tizen-manifest.xml and add the following code:
 For iOS/MacCatalyst and Windows you don’t need an additional configuration.
Let’s start!
What is a FileSaver?
This is an API that is part of the MAUI Community Toolkit, which allows you to select a file and save it to a destination folder on your device’s file system
How to implement it?
Step 1⃣ : Let’s use Dependency Injection
For this example, we will use Dependency Injection. If you want to know more about this topic you can enter to the article .NET Dependency Injection.
➖ Registering the FileSaver: For the first step, we need to use the FileSaver, which is responsible for saving the desired file on the system. Since we’ll be using Dependency Injection, we need to register it.
To do this, go to MauiProgram.cs, navigate to the CreateMauiApp method, and add the following code after the builder.
➖Injecting the service: Now go to your MainPage.xaml.cs, and let’s inject the File Saver as I show you below:
Step 2⃣: Saving the file
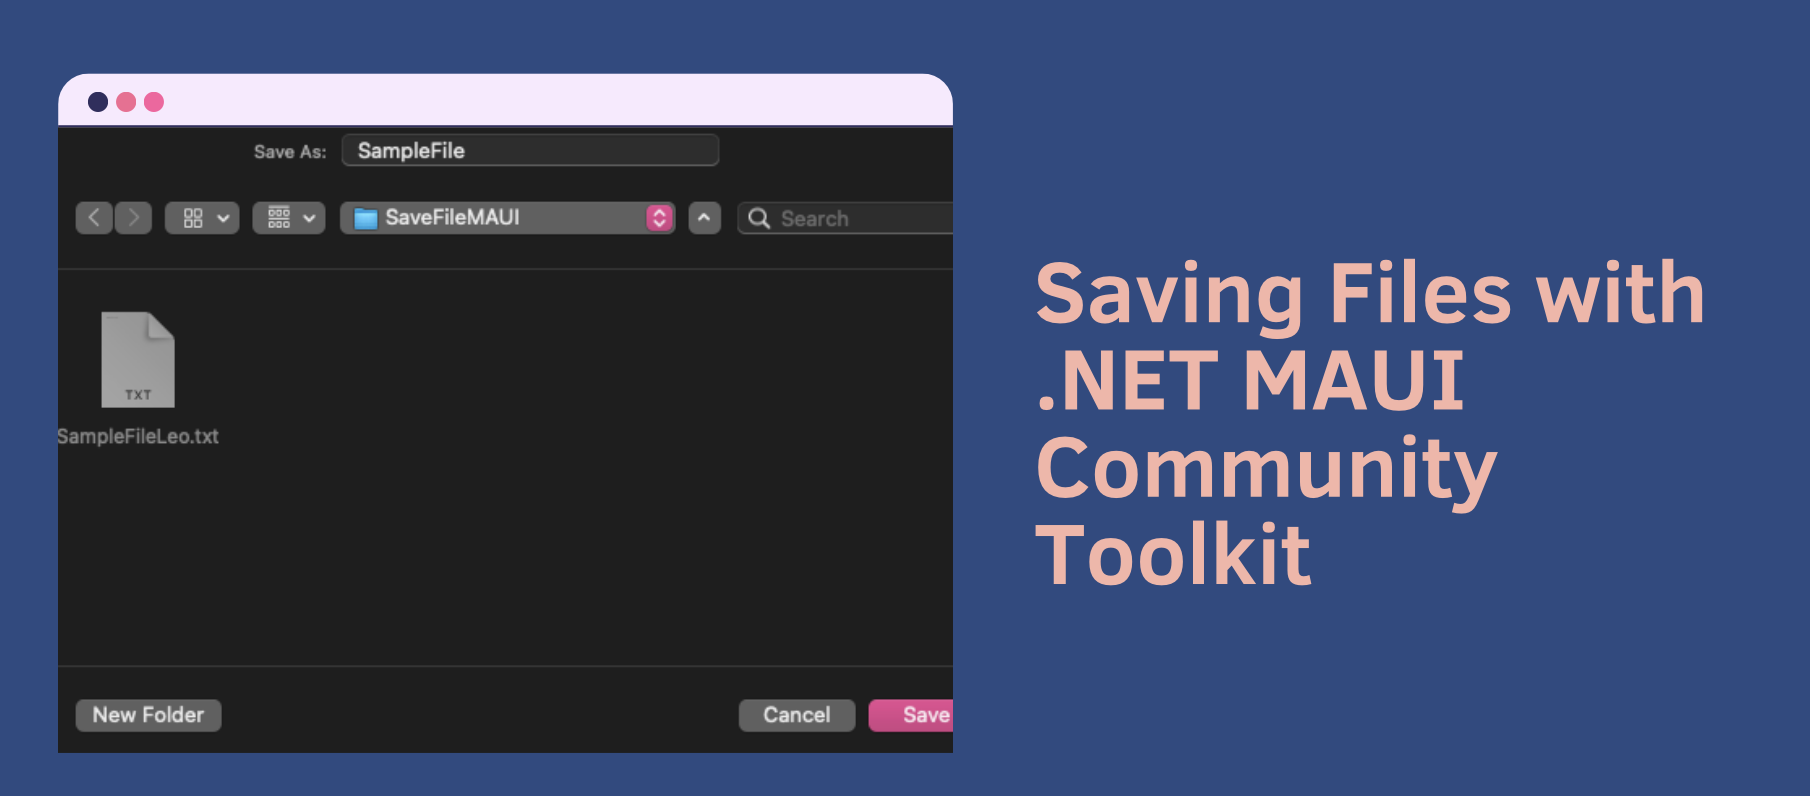
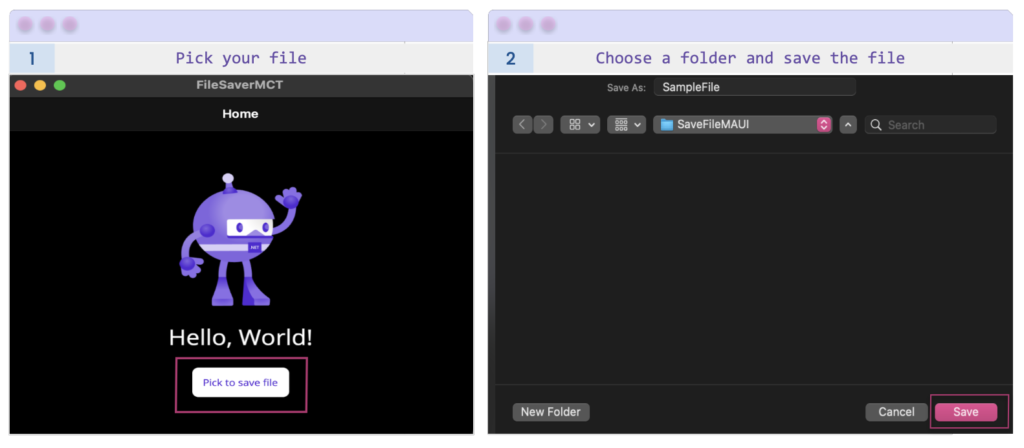
We will use the SaveAsync() method, which displays a dialog on the screen to allow us to select a file and save it to a destination folder on the file system. This method contains the following set of properties:
➖ Initial path: This is the initial path (suggested) that appears by default in the dialog box when the user goes to save their file. – It’s of string type.
➖ File name: Upon saving a file, the user is presented with a suggested name, which can be edited or kept as is. It is essential to include the file extension in the suggested name. – It’s of string type. – [Mandatory]
➖ Stream: This is an abstraction of a stream of bytes. Here, you will manage all the contents of the file that you want to save. – It’s of Stream type. – [Mandatory]
➖ CancellationToken: Allows you to send a cancellation for the operation you are doing. – It’s of CancellationToken type. – [Mandatory]
Now let’s se how to do it in code
Add the cancellationToken: To do so, locate the comment in step 1 that says “Add the CancellationToken here” and add the following line of code:
⚠ If you want to cancel it, you just have to do the following:
To prepare the content of the file that we are going to save, we must first create a new method, in this example we will call it SaveFile. Inside, you will see two lines of code which I explain below:
🔹 We create a stream that we will later pass as a parameter to the SaveAsync method. For this example, we will use text, but you can replace it with other type of content you wish to save.
🔹 We call the SaveAsync method, we use “SampleFile.txt” as the suggested file name.
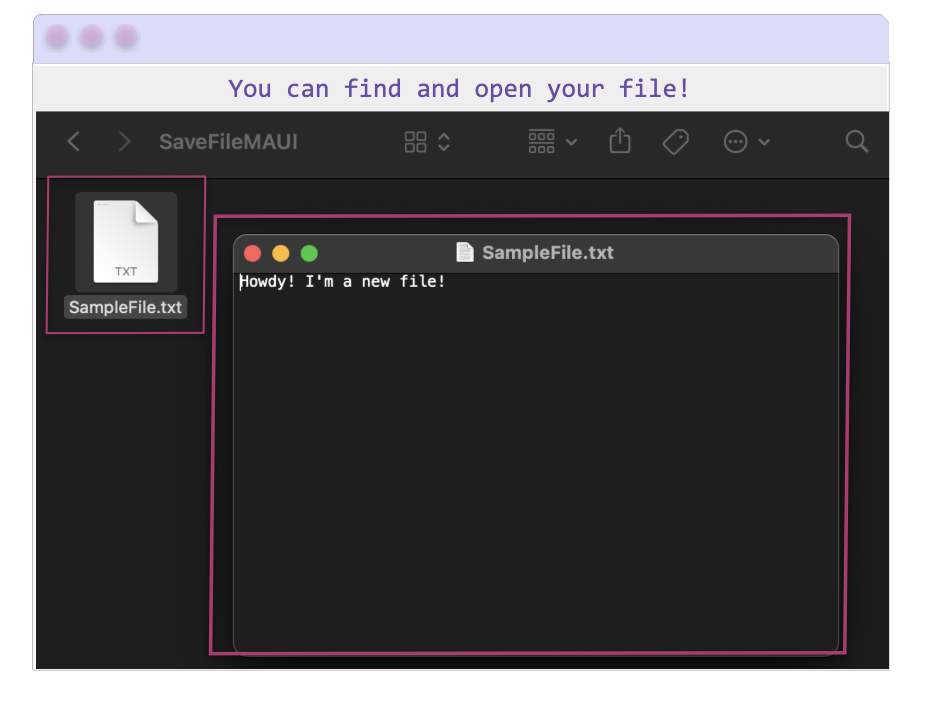
Finally, let’s see the result!
Additional Topics
FileSaverResult
The FileSaverResult covers the result returned by the SaveAsync method. It contains a set of properties and methods that can help determine if the operation was successful or if there was an exception, among other informations as shown below:
🔹 File Path: Is a property that refers to the location on disk where the file was saved. – It’s of string type.
🔹 Exception: Returns the Exception in case the save operation failed.
🔹 IsSuccessful: Indicates the success of the operation by returning a boolean value.
🔹 EnsureSuccess: Is a method that checks if the operation was successfull.
To access these methods and properties, just save the result of SaveAsync using await and don’t forget to make the method async.
And done! 😎 From now on, you know how to save files in your .NET MAUI applications! 💚💕
<Label Text=”Thanks for reading! 👋 ” />
Spanish post:
References:
- Gerald Versluis’s Video
- https://learn.microsoft.com/en-us/dotnet/communitytoolkit/maui/essentials/file-saver?tabs=tizen?WT.mc_id=DT-MVP-50033