

In some App’s is required to navigate within the same screen throughout different sections with their own design and information, each one independent of the other. To do it, we have a page type named: TabbedPage. Let’s learn how to implement it.
What is a tabbed page?
It’s a page that contains different tabs or sections that make possible the navigation between them in the same screen.
Defining the sections
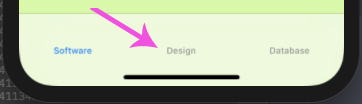
To start, we have to define the different sections that our TabbedPage will contain. In this case for the example shown below, we have the following sections: Software, Design and Database.
We just have to add as many pages of ContentPage type as sections are needed. For the example, let’s add three pages.
There are some attributes that we would like to keep in mind to add them to the Tabbed page such as:
◽ The title: Each section must have a Title attribute which will identify the page in the tabbedpage. (Mandatory)
◽ The Icon: To add an Icon add the Icon attribute to the page and done!
Inherit from the TabbedPage class in your code behind:
Creating the Tabbed Page and adding the child sections.
 .1⃣ To add a Tabbed Page you just have to create a page and change the previous page type by TabbedPage.
2⃣ Add the page created for the section inside the <TabbedPage.Children> tags:
3⃣ Finally, you must have your code like this:
That’s all, thank you for reading this article! ?
Spanish post:https://medium.com/@reyes.leomaris/agregando-tabbed-page-a-nuestras-pantallas-en-xamarin-forms-b81a01d8b298


1 thought on “Simple way to add a Tabbed Page in our screens in Xamarin Forms”